Iced Matcha Coconut Latte

When I moved to Montreal for graduate school shortly after starting this blog, I eased into life there slowly. My program would last two years; there was no rush to see (and eat) everything the city had to offer. I had plenty of time to explore. I stayed close to home, visiting the markets and bakeries lining my walk to the metro station, venturing further only when invited by friends. 

When I quit graduate school a few short months later, I scrambled. With a couple weeks left before flying back home, there was not enough time to check everything off the to-do list I had carefully curated. The plates went uneaten. The sights unseen.

I called Montreal my home, but I had missed out on many of the things that made Montreal so unique. As I boarded the plane, I vowed that I would never do this to myself again, whenever and wherever I should move in the future.

Three weeks into my move to the big city, I find myself in the same pattern as in Montreal, a pattern I promised myself I would never fall into again. I unconsciously created a bubble for myself, extending five miles in every direction, where I walk through the mundane activities of everyday life. My mother keeps asking me if I have gone exploring, visited a museum, walked through a park.

Not yet, I reply. I have plenty of time

On my short drive to the gym this morning, I listened to a segment on the radio about exploring the city you live in as a visitor instead of a resident. Instead of dismissing certain restaurants or neighborhoods as places you can visit any time, it is important to extend the limits of your backyard by making it a point to venture out of that familiar comfort zone. 

I moved to the city for the diversity and variety. It is time to leave the bubble and embrace it. 

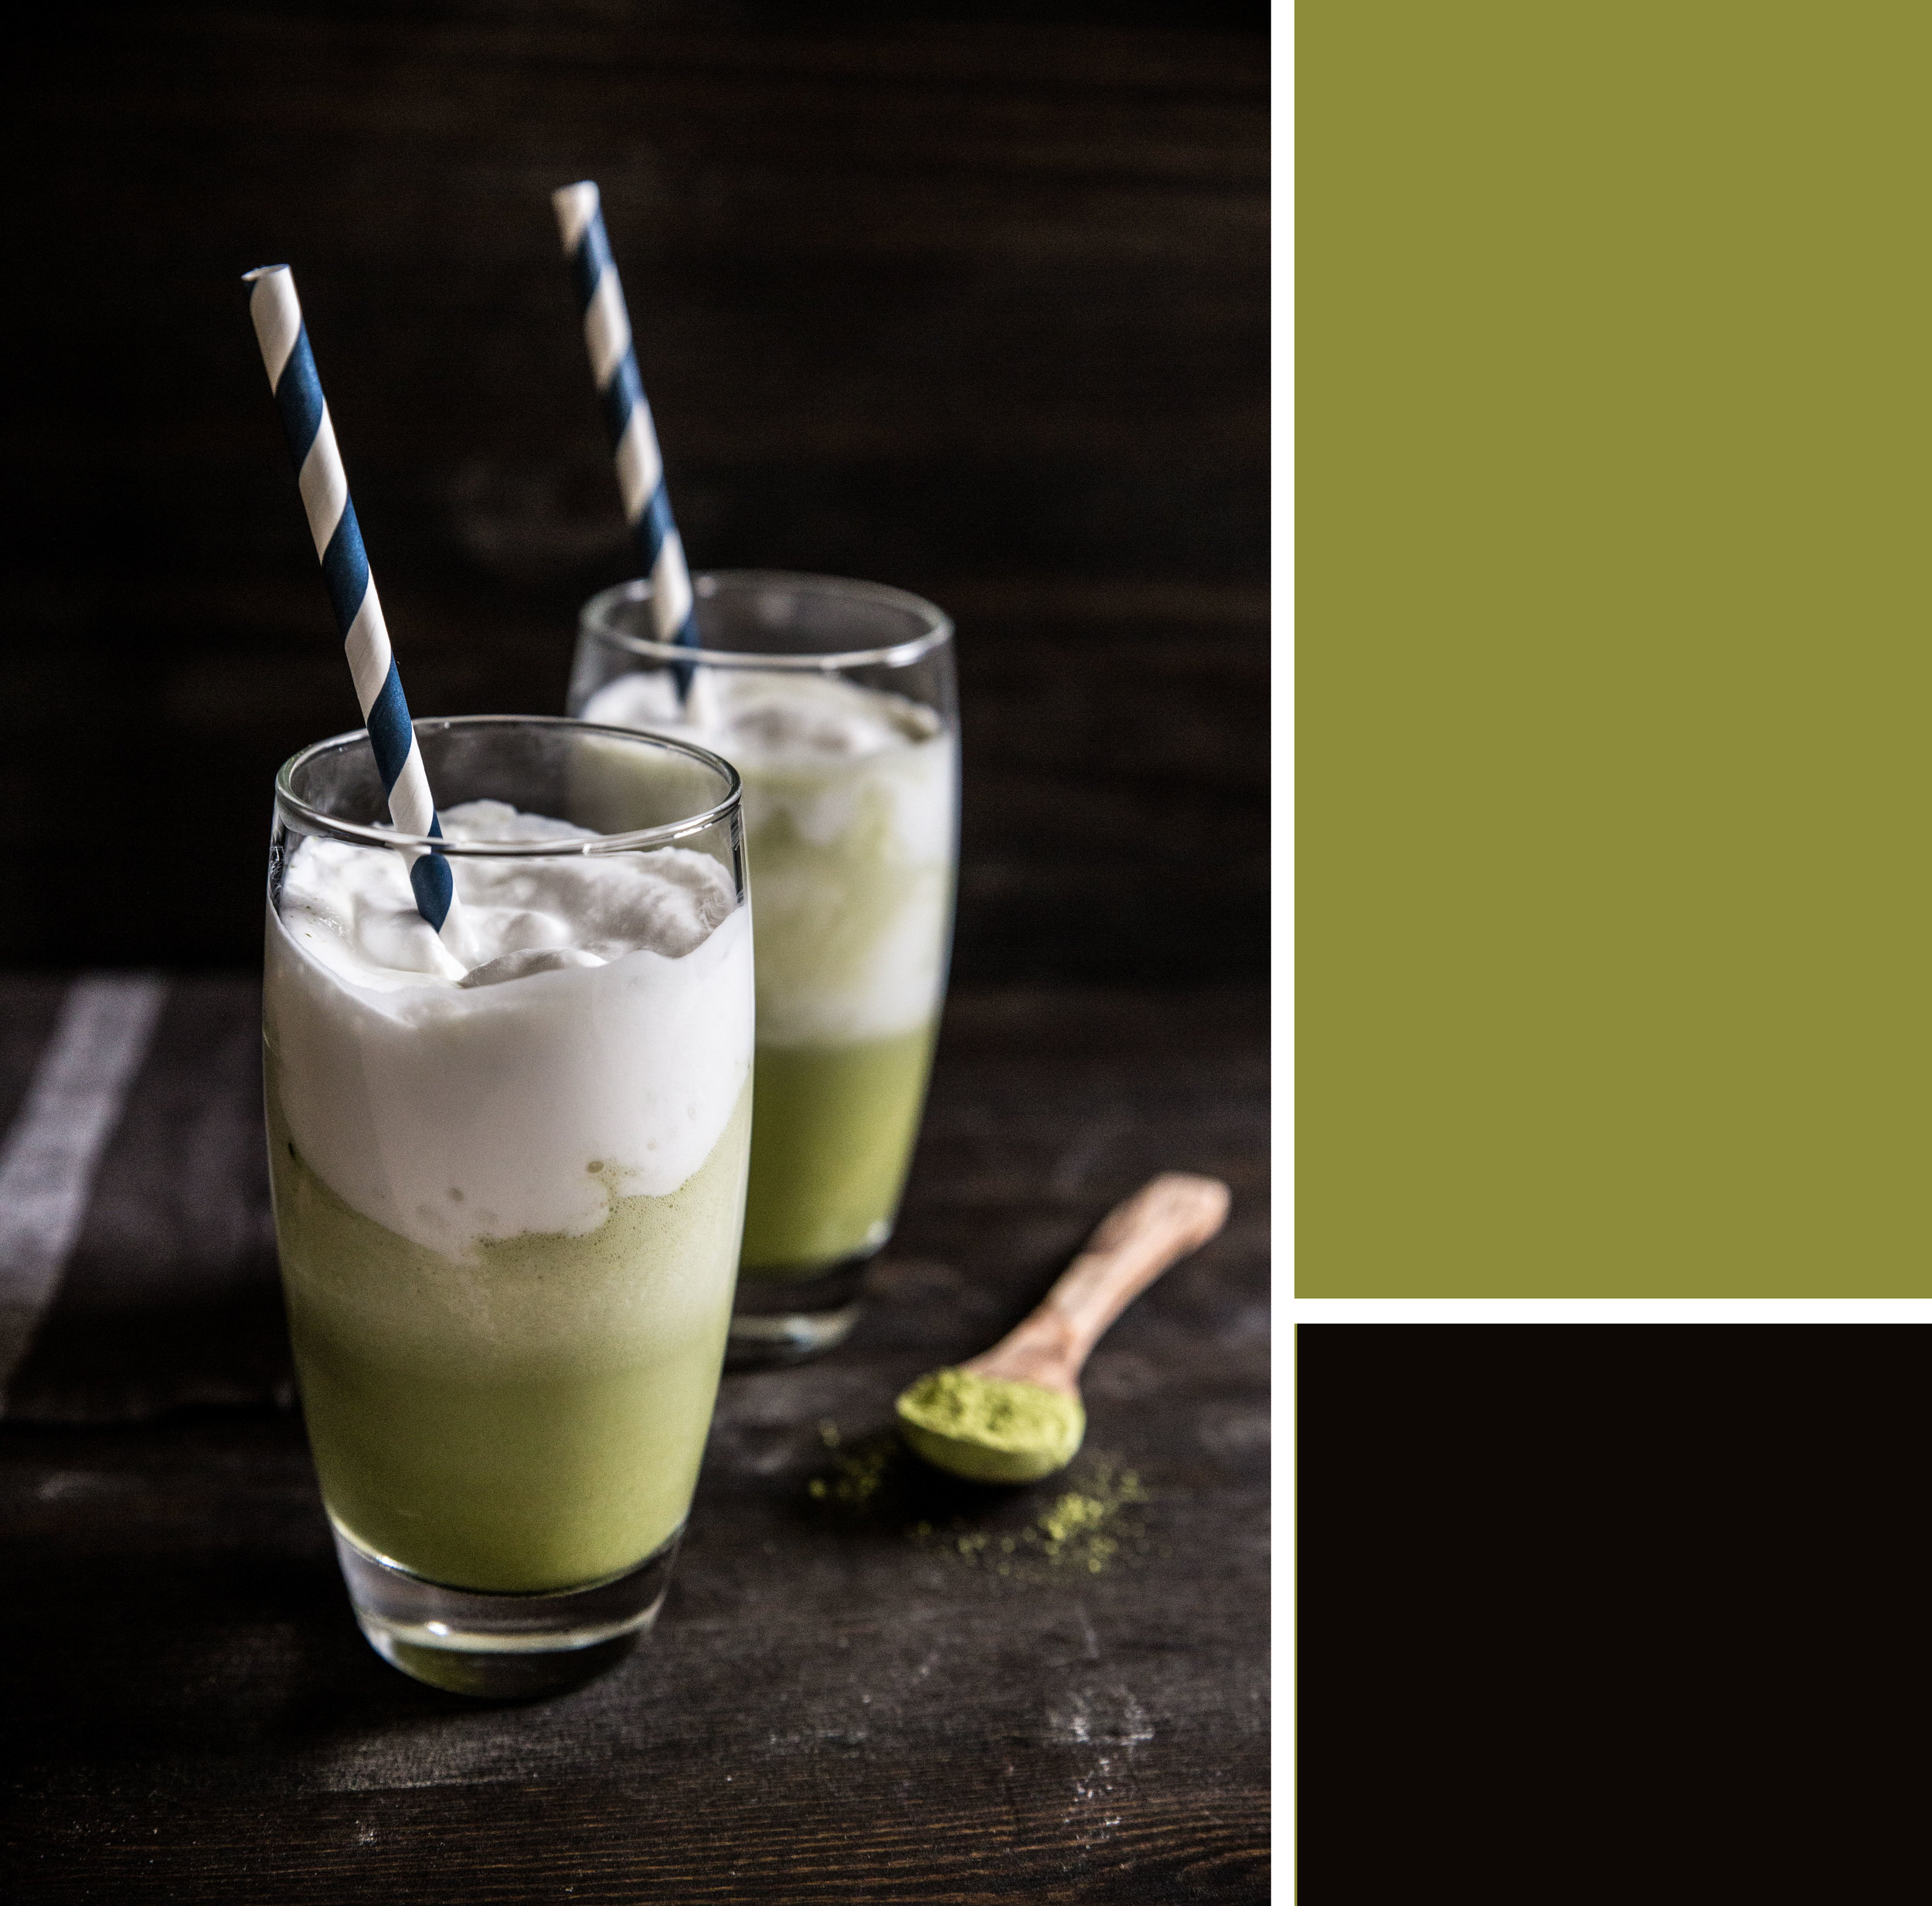
Matcha is an ingredient I have known about for a long time, but never took the time to fully explore. Unlike most tea leaves, matcha is created when the entire green tea leaf is crushed into a fine powder, giving it an intense green tea flavor. It can be used for flavoring in baking, but traditionally it is used to make tea. I may have taken a less traditional route by using the powder to whip up an iced latte, but after looking longingly at my empty glass, I can assure you it was an excellent decision.

Although I have professed myself as an avid black tea fan in the past, I may have to make a little more room in my cupboard for the green.

Iced Matcha Coconut Latte is a treat for the eyes and the tongue. Matcha powder is blended into almond milk, with maple syrup for sweetness, and layered into a glass with thick coconut milk. The matcha and coconut complement each other well, making this latte as distinctive in flavor as it is beautiful.

Matcha should be a vibrant, bright green color when purchasing. Over time, the color will fade into a dark mossy shade. Use within 6-12 months for best results. Matcha can be found in tea shops, some health food stores, and online.

One Year Ago: Salted Chocolate Chunk Cookies 
Two Years Ago: Blueberry Braided Bread and Date Flapjacks
Three Years Ago: Maple Roasted Peaches and Rum Raisin Oatmeal Cookies
Four Years Ago: Malted Chocolate Cupcakes, Coconut Pancakes, and Rocky Road Cookies
Five Years Ago: Chocolate Prune Cake

Iced Matcha Coconut Latte

Yields 2 servings (or 1 large)

1/2 cup (120 mL) almond milk (or milk of choice)
1 1/2 teaspoons matcha powder
1 tablespoon maple syrup
1 teaspoon vanilla extract
Large handful of ice
1 cup (250 mL) coconut milk*

Place all ingredients except the coconut milk in a blender and blend until smooth. Divide matcha mixture evenly between two glasses. Pour the coconut milk over the matcha, dividing evenly between glasses. Stir before drinking.

* Full-fat (canned) coconut milk is my personal preference because it is so creamy, but light coconut milk will work as well. Avoid coconut milk from a carton (the milk is too thin to layer).

Coconut Almond Quinoa

A new year brings a fresh outlook and a clean slate. The last few years I have wavered in my thoughts toward resolutions. I have made them (and kept them), made them (and ignored them), and refused to make them in the first place. Last year, while buried deeply in work and stress, the prospect of trying to improve anything about myselfwhen I could hardly stay afloat to begin withseemed almost laughable. As we enter into 2015, I feel quite similar to last year: too tired to think up a list of resolutions. I know that I should be thinking positively, taking time to imagine a better self, but I'm writing this after an eleven hour work day and, with a pile of work to still sift through before bed, I'm struggling. 

Instead of putting even more pressure on myself by resolving to cook healthy meals or to take advantage of the gym membership I have been paying for (but not using) the last three months, I am going to switch it up and resolve to teach myself a few new tricks.

While baking comes quite naturally to me, cooking is entirely something else. Seasoning dishes, cooking meat, or dreaming up new dishes are not tasks I feel comfortable with (nor am I good at any of them). For this reason, I want to learn to truss and roast a proper chicken. I intend to go back to old episodes of Julia Child's The French Chef and let her show me the way.

I have never made a batch of perfect macarons on my own. After buying four pounds of almond flour, this will change.

As I have said a dozen times before (and I will say a dozen times more), I adore reading. Earlier this year, without space for a bookcase, I bought a Kindle to encourage myself to delve into the books again. While I didn't think I would enjoy a digital reader, I surprised myself by loving everything about it. This year I want to make time to read more books, even if it is just setting aside a few minutes before bed. 

And, as always, find the inspiration to keep baking.

For the past few years, I make a sweetened quinoa for breakfast each morning, finding it a filling and satisfying way to begin the day. With a new year upon us, I thought a new recipe of an old favorite seemed suitable. The quinoa cooks in coconut milk, becoming creamy and subtly flavored. When cooked, almond butter is added for a nutty undertone and maple syrup is swirled for sweetness. A topping of chopped almonds and toasted coconut complete the ensemble. Best of all, this makes a large batch, which can be heated for breakfast throughout the week.

One Year Ago: Almond Date Banana Smoothie
Two Years Ago: Candy Cane Cupcakes, Chocolate (Dairy-Free) Ice Cream, Peanut Butter Banana Oatmeal, and Raspberry White Chocolate Scones
Three Years Ago: Peppermint Hot Chocolate, Green Tea Coconut Ice Cream, and Chocolate Lavender Cupcakes
Four Years Ago: Peppermint Ice Cream, Banana Cinnamon Muffins, Vanilla Pear Milk, and Cranberry Chocolate Chip Cupcakes

Coconut Almond Quinoa

Yields 3-4 servings

14 ounces (414 ml) full-fat or light canned coconut milk
1 cup (170 grams) quinoa, rinsed and drained
2 tablespoons almond butter
1-2 tablespoons maple syrup (adjust to personal sweetness)
Chopped almonds
Toasted coconut flakes
Splash of soy or almond milk

In a large saucepan, stir together quinoa and coconut milk. Bring to a boil over medium-high heat, reduce to low, and simmer for 15-20 minutes, or until tender and liquid is absorbed. Stir in almond butter and maple syrup, adjusting for personal sweetness. 

Divide evenly between 3-4 bowls and top with chopped almonds and toasted coconut flakes. Add a splash of soy or almond milk. 

To store, quinoa can be kept in the refrigerator for several days. Reheat in the microwave, add a splash of milk, and it can be made as a quick weekday breakfast.

Pumpkin Pie (Dairy-Free)

A few inches of snow cover the sidewalks and a mug of warm black tea is an evening necessity. The fewer hours of daylight make the nights grow long. I check the clock frequently, wondering why time appears to be passing faster than the hands on the clock read. At long last, winter is upon us. The feeling is still fresh, a seasonal novelty. For now, it suits me just fine.

Even though Thanksgiving is only a week away, I could swear that it was nearly Christmas. I fear I am the latest victim of "Christmas creep," the idea that the early exploitation and over-commercialization of Christmas makes it feel as if it is just around the corner instead of an entire month away. With sugar cookies on the brain and a Netflix queue of holiday movies, I knew I needed to do something drastic, lest I grow tired of the holiday season before it had even begun.

And so, I pushed aside thoughts of the holidays, pulled the flour out of the cupboard, and made myself an old-fashioned pumpkin pie. There is nothing more reminiscent of Thanksgiving than a large slice dolloped with whipped cream. I may not be able to stop the "creep," but I do have the power to claim back Thanksgiving as my own.

This pumpkin pie is dairy-free, although you would never guess it. I have been dreaming of this pie long before the leaves fell from the trees, but I waited until the time was right to take it for a spin. I substituted the butter in the crust with dairy-free margarine for a flaky texture (Earth Balance is my personal brand of choice). Instead of heavy cream, I used full-fat coconut milk. I worried that the milk would lend a subtle coconut flavor to the final product, but it is completely masked by the pumpkin and spices. This pie truly tastes exactly like its dairy-filled counterpart, which is an accomplishment of its own.

I shared this pie with my coworkers for a Tuesday lunch dessert. Even unadorned, the entire pie disappeared in short time. One coworker shared that this was the best pumpkin pie she has had since her grandmother had passed away many years ago. To me, there is no higher compliment this pie can receive.

IMG_9685-2.jpg

This dairy-free pumpkin pie will be a hit whether or not its "secret" is revealed. The filling sets up well, but still manages to retain a light texture. The pie is spiced primarily with cinnamon and ginger, which complement the pumpkin nicely. Serve warm or chilled with a dollop of coconut whipped cream.

One Year Ago: Stovetop Popcorn and Gingerbread Bundt Cake with Pear Caramel
Two Years Ago: Pumpkin Rolls, Butternut Squash Cake with Cream Cheese Icing, Baked Apples, and Molasses Cookies with Ginger Cream Cheese Filling
Three Years Ago: Pumpkin Spice Latte Cheesecake, Spicy Pumpkin Taco Dip, Apple Cinnamon Cake, and Grandma's Applesauce
Four Years Ago: Pumpkin Chocolate Chip Cookies, Fig & Balsamic Jam, Pumpkin Spice Oatmeal, and Sweet Potato Fries

Pumpkin Pie (Dairy-Free)

1 recipe for single pie crust dough
2 1/2 cups (670 grams) pumpkin puree
1/2 cup (100 grams) brown sugar, packed
1/4 cup (60 ml) maple syrup
1 teaspoon ground cinnamon
1 teaspoon ground ginger
1/4 teaspoon ground nutmeg
1/4 teaspoon ground cloves
1 teaspoon salt
3 large eggs
1 teaspoon vanilla extract
1 1/3 cups (315 ml) full-fat coconut milk
Coconut whipped cream, optional

On a lightly floured surface, roll out pie crust dough into a 14-inch round. Wrap dough lightly around rolling pin and transfer to a deep 9-inch pie pan. Gently press dough into the bottom and sides of the pan. Trim the dough to allow a 1-inch overhang. Pinch dough between thumb and forefinger to make a decorative edge around the rim. Refrigerate until chilled, about 30 minutes.

Preheat oven to 425 degrees F (218 degrees C).

Using a fork, prick a couple dozen holes into the bottom of the crust to prevent the dough from rising. Bake for 15 to 20 minutes, or until crust is lightly browned. Remove from oven.

Reduce oven temperature to 350 degrees F (180 degrees C).

In a large bowl, whisk together the pumpkin, brown sugar, maple syrup, spices, salt, and eggs until uniform. Gradually mix in the vanilla extract and coconut milk. 

Pour the pumpkin filling into the prepared pie crust (depending on the size of your pie pan, you may have a small amount extra). Bake for 75 to 80 minutes, or until the middle barely jiggles when shaken and a toothpick inserted into the center comes out clean. If the edges darken too quickly, line the outer crust with aluminum foil to prevent further browning. Remove from the oven and cool at room temperature to finish cooking the center of the pie.

Serve warm or chilled with a dollop of coconut whipped cream.